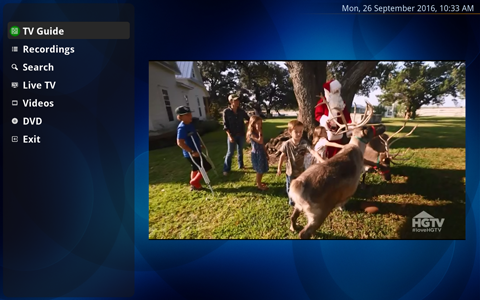
Truly ‘Cutting the Cord’. By Ed and Dee Indovina.
We have read a lot about how people were ‘cutting the cord’ from cable and satellite television. The only problem was that everyone we talked to weren’t truly ‘cutting the cord’. While they had abandoned cable TV many of them still had their subscriptions to Netflix, Hulu, Amazon, Playstation Vue, and Sling. Where’s the advantage? A basic cable sub costs $40 and subscriptions to the above mentioned services average between $8 to $12 a month each. By the time you’re done you’re still up to a cost of at least $100 including the basic cost
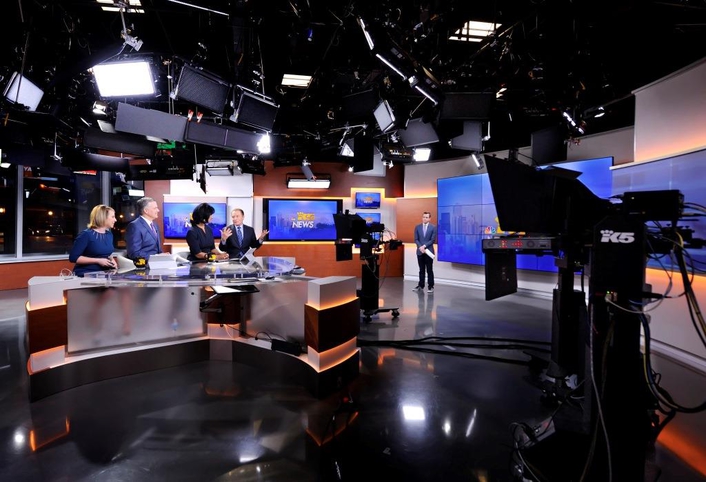
0282-KING5-First-Air-BTS-Jerry-and-Lois-Photography-2016.tif
KING5 TV | First broadcast from their new location | Feb 15, 2016
© Jerry and Lois Photography
All rights reserved
http://www.jerryandlois.com
of Internet service.
Now, first things first, you’re never going to fully wean yourself from the service providers. To truly run a full service HTPC (Home Theater PC) you’re going to need a good Internet service. Thus, that’s going to cost you depending upon your area. For us it’s about $64.95 per month after fees and taxes. You can always decrease your expense in that area by using your own modem, etc…
Some of you reading may be wondering what I mean by a ‘full service’ HTPC unit (of course, a lot of you aren’t because you knew enough to look here). For the sake of this article I am going to list the elements I feel are needed for a full HTPC unit:
- Over the air television stations
- A fully functional DVR setup
- Live television manipulation
- On demand video library
- On demand music library
- Photo gallery slideshow
- Remote television porting
We will go over the bullet points and then proceed into the hands on creation of our system.
Over the air television stations
Over the air television broadcast (OTA) is exactly how it sounds. Back in June of 2009 all televis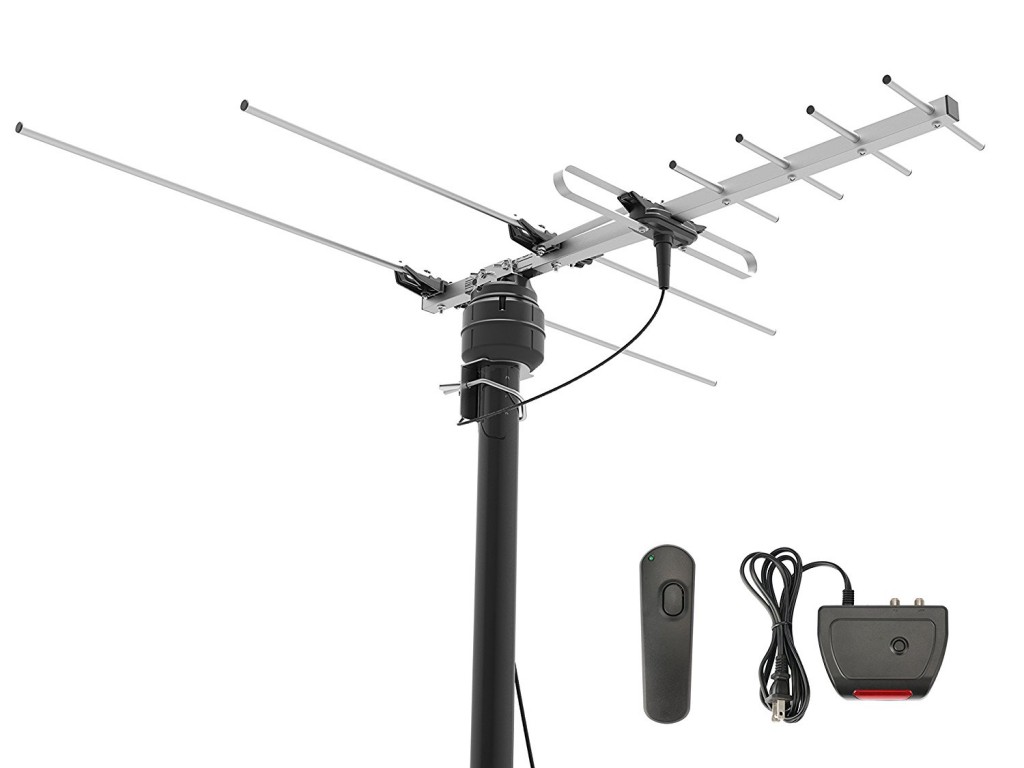 ion stations were required to broadcast in digital transmissions only. This not only opened up broadcast frequencies to emergency responders but it also allowed for transmission of television signals in the 1080p format. Most areas have a decent quantity of OTA stations available. My local area I am able to obtain 35 (updated 12/2018) stations over the air with an outside antenna. OTA thus necessitates the inclusion of digital television tuners in your HTPC setup. In reality, the OTA broadcast is in higher resolution than the standard cable transmission.
Fully functional DVR setup
A good HTPC setup with OTA stations should include a DVR (Digital Video Recorder) setup or also known as PVR (Personal Video Recorder). Operating off of the base HTPC, you will be able to record and playback television shows of your choice. Like the ‘premium’ cable setups, you will be able to schedule recordings while still watching live television. Thus, the more tuners you have in your main setup the greater the number of shows you can simultaneously record and watch. A good rule of thumb is to have one tuner for every television you will have on the network and at least one additional tuner for recording.
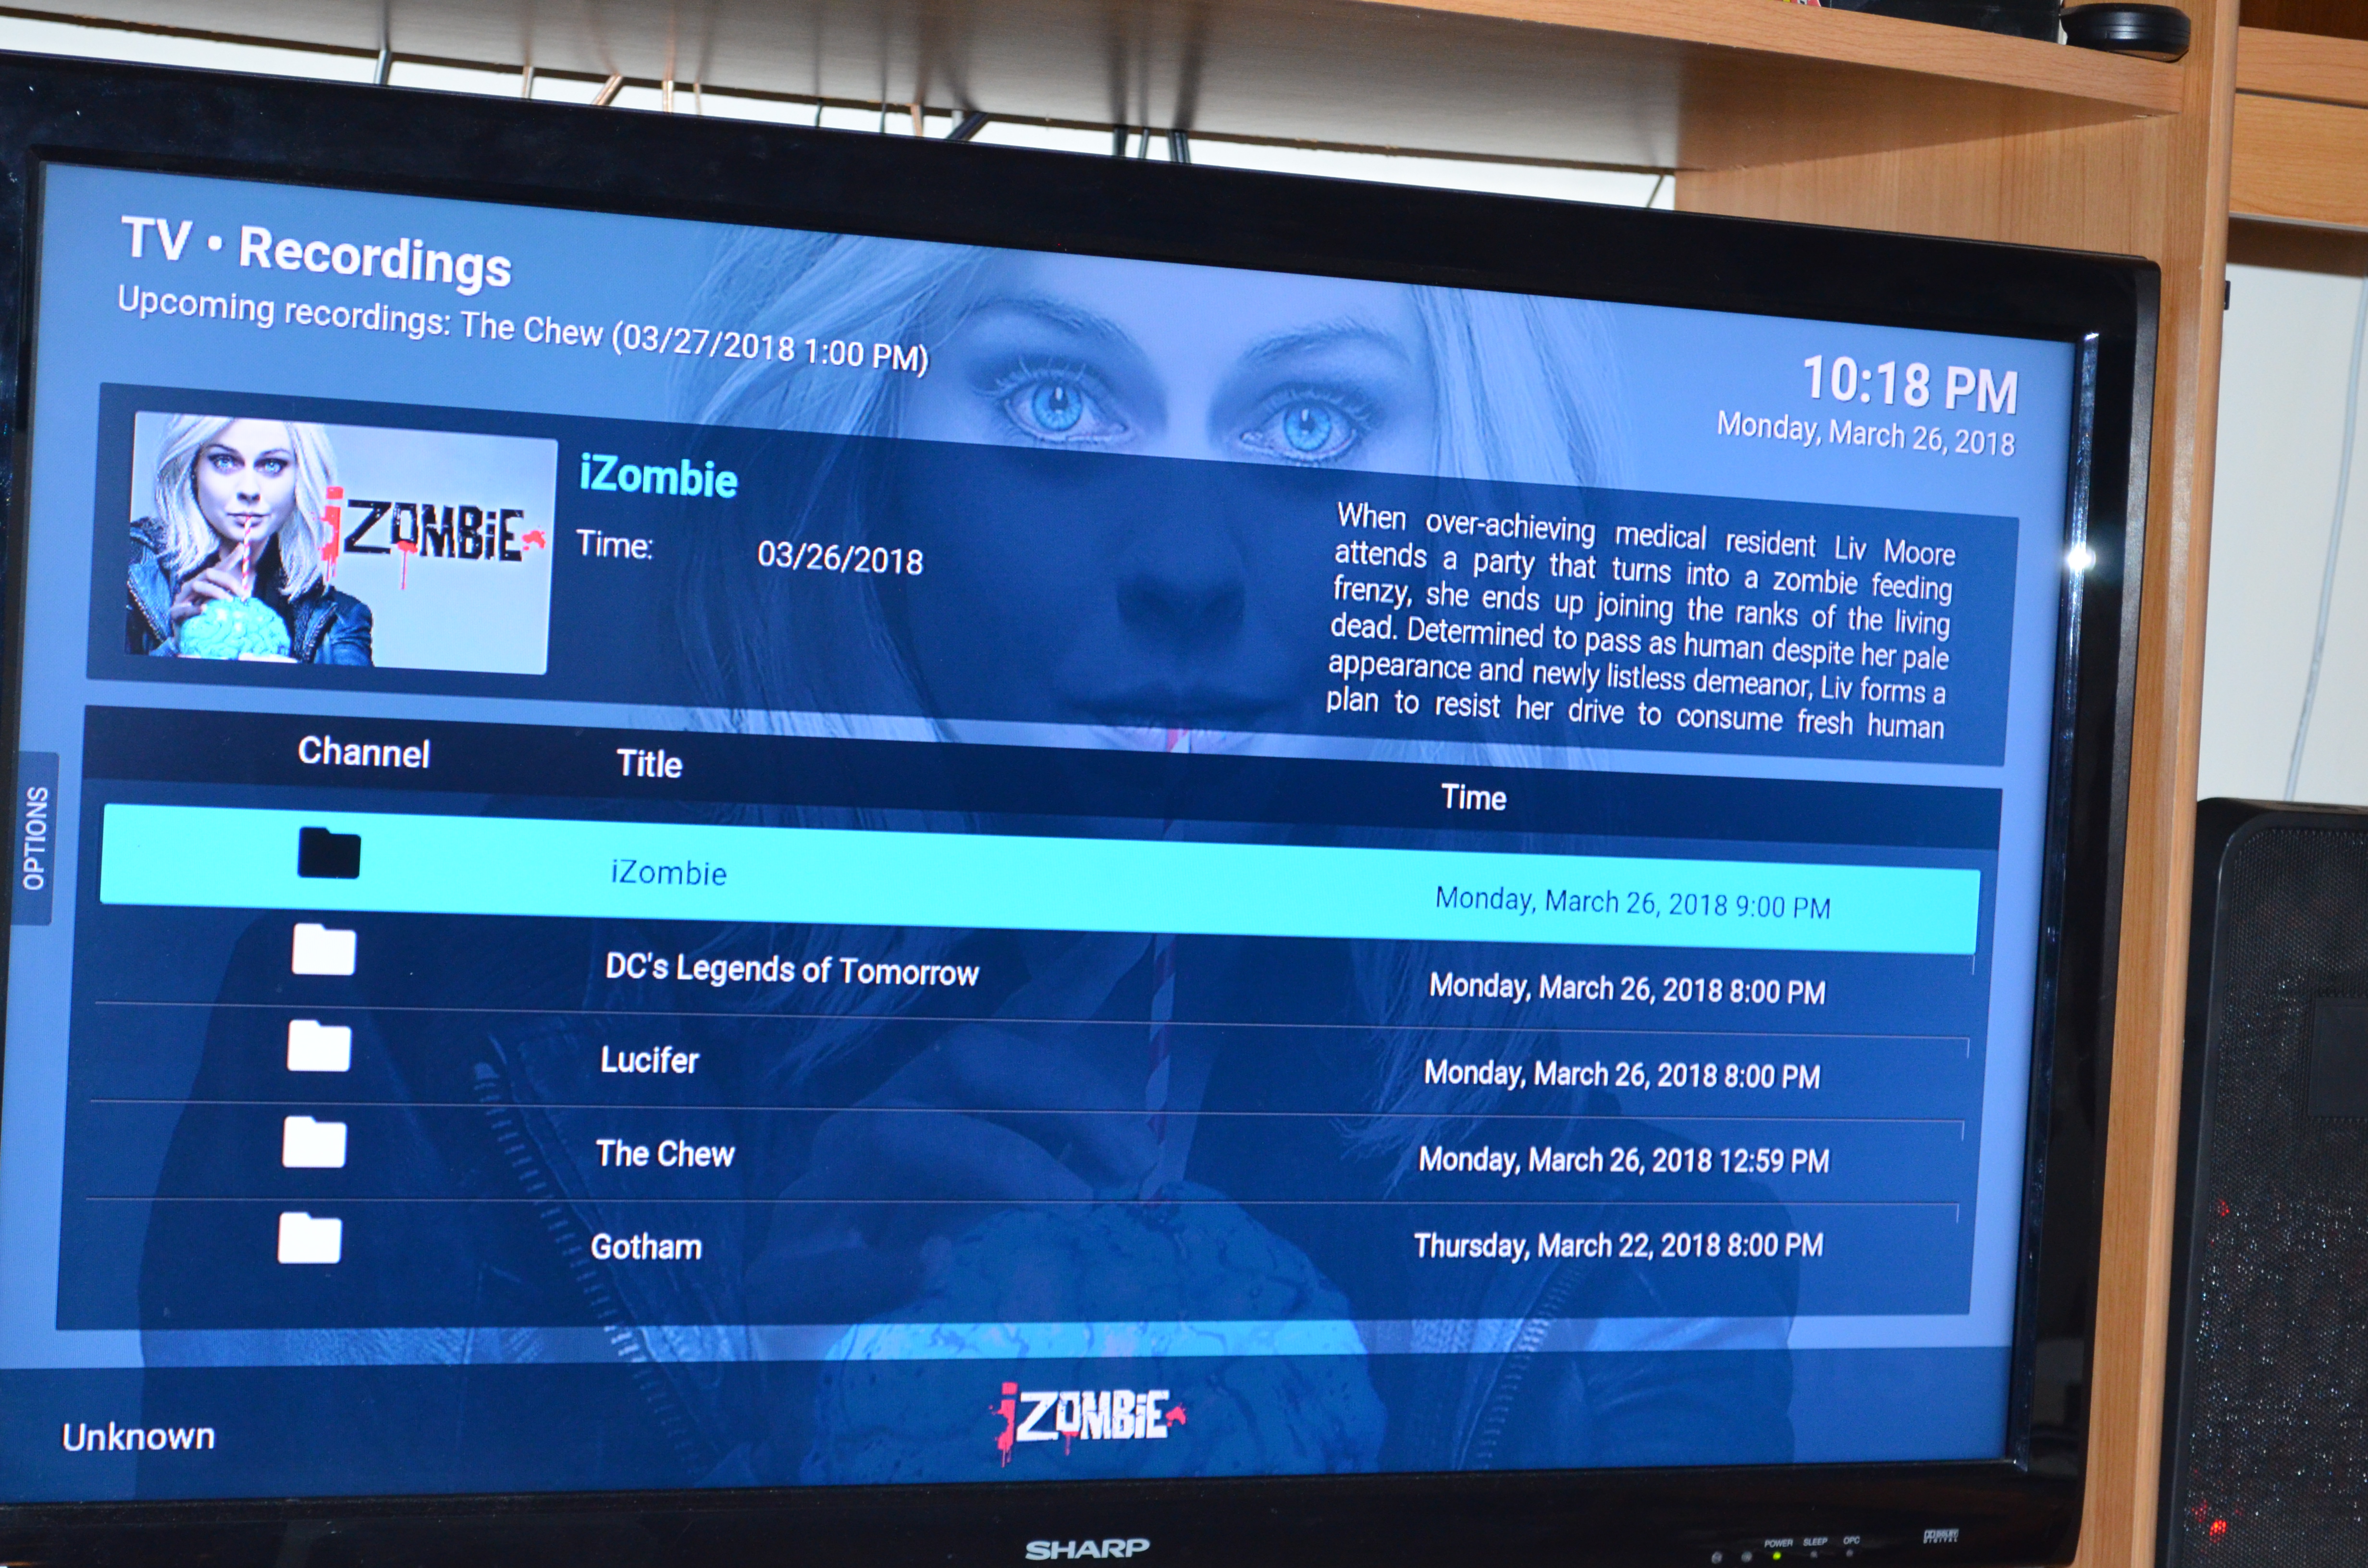
A shot of our typical DVR recordings
Another thing you will have control over is the number of shows you can tape and store. If you feel that you want or need more capability you can add as large a storage disc as you want. The cable companies allow you a finite amount of space (we know, we wanted to try and tape and save everything we could and we consistently ran out of space.) An average show takes up about 5gb space (in HD) on a drive. Thus, if you like to re-watch programs it would be wise to set up a larger SSD for your taping. Again, something you cannot get from the corporate cable companies.
Live Television Manipulation
Live television manipulation allows you to pause, fast forward, and rewind live television that you are watching. Once again, a feature that you normally only get with a ‘premium’ cable setups. To truly make this feature seamless it will be necessary for you to incorporate an SSD drive for your television streaming.
On Demand Video Library
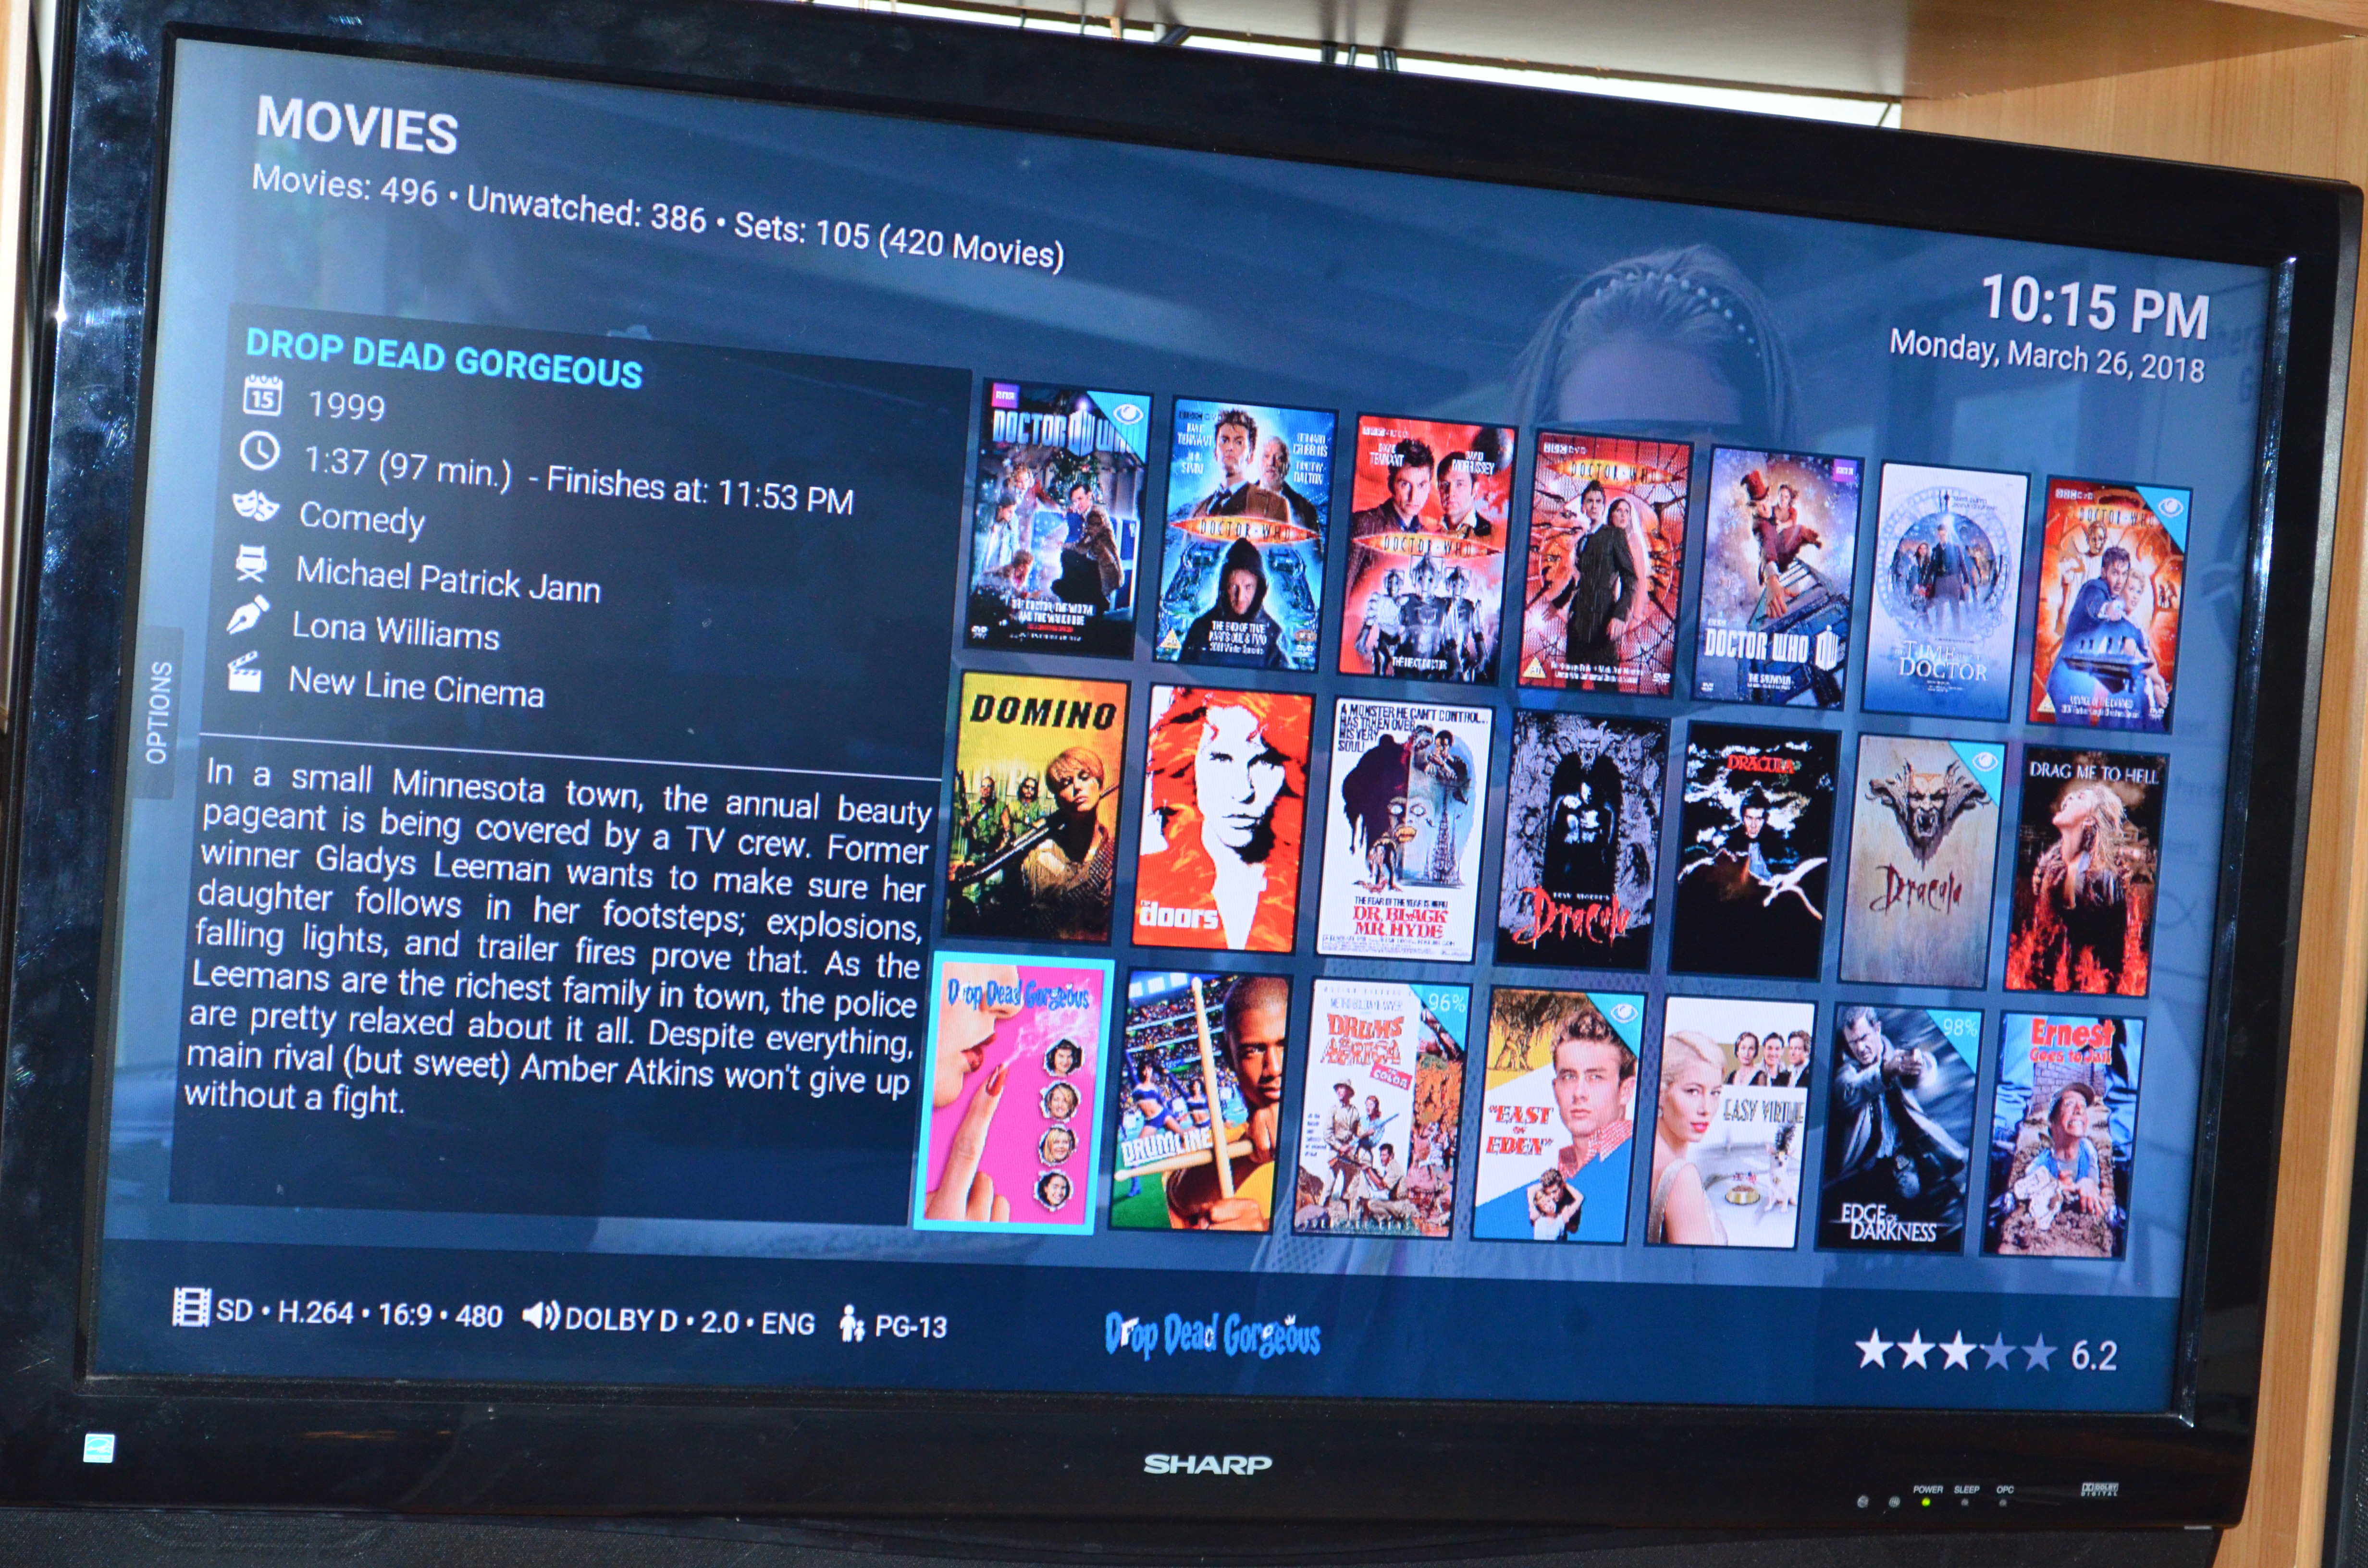
Screenshot of our movie library. Note the number of movies burned on our server in the upper left.
Now we get to one of the other big appeals of an HTPC. How many times have you decided to flip to a service such as Netflix to watch a movie you already own just because you didn’t want the hassle of looking for the disc, putting it in the player, etc…? Probably more times than you’d like to admit. The whole purpose of the HTPC is to have every movie you own burned to your hard drive and ready to be shown in the Hi-def, DTS sound quality that you want. So, we will go over the steps necessary to create your own library of immediately accessible movies.
On Demand Music Library
As we just stated prior, music is another form that we sometimes settle for inferior playback. By burning your entire music library to the server hard drive you can listen to your music whenever you want in any area that you have a network port. And, your music can be burned in the definition it was meant to be heard in.
Remote Television Porting
To me, this is the big thing in making a full house HTPC system. This is the ability to have each of your televisions tied into the main server/library/backend and take advantage of everything you have entertainment wise. Simply stated: Any television in your setup will have access to all recorded programs, OTA stations, movies burned, and music burned. You can also control the server from any of your remotes and set up recording schedules, etc…
All right, now that we’ve covered the basic outline let’s start building our HTPC unit. For the purposes of this example I will cover the setup that we used.
Hardware used:
HTPC Base unit /Server
For our base unit/server we used the following hardware:
- Case: DIYPC Cuboid Micro ATX Tower with 140mm fan front, 120mm fan rear – $79.00
- Motherboard: ASRock A88M-G /3.1 – $70.99
- Processor: AMD A8-7600 Quad Core 3.1 Radeon R7 – $64.99
- Memory: Ballistix Sport DDR3 1866 2X4GB sticks – $73.99
- Power supply: EVGA 450 B1 – $ 44.99
- Optical Drive: Asus Blu-Ray Drive – $ 52.99
- Storage: One Seagate 2 TB drive – $99.99 each, One Samsung 860 SSD 500Gb -$144.99
- Additional Case Cooling : Two (2) Cooler Master 120mm Case fans – $ 12.99
- Television Tuner: Hauppauge WinTV Quad HD Tuner – $ 99.00
- Flirc Universal Remote Control Receiver – $25.00
Total approximate cost of Server set up: $674.00
Many of these components can be substituted for similar devices and these go on special at various times.
Now, onto the method to the madness behind these choices for the server components.
Firstly, we wanted a case which would afford the most air flow for the base components. The DIYPC Cuboid provides us with just that. With its ample room, supplied fans, and the ability to add f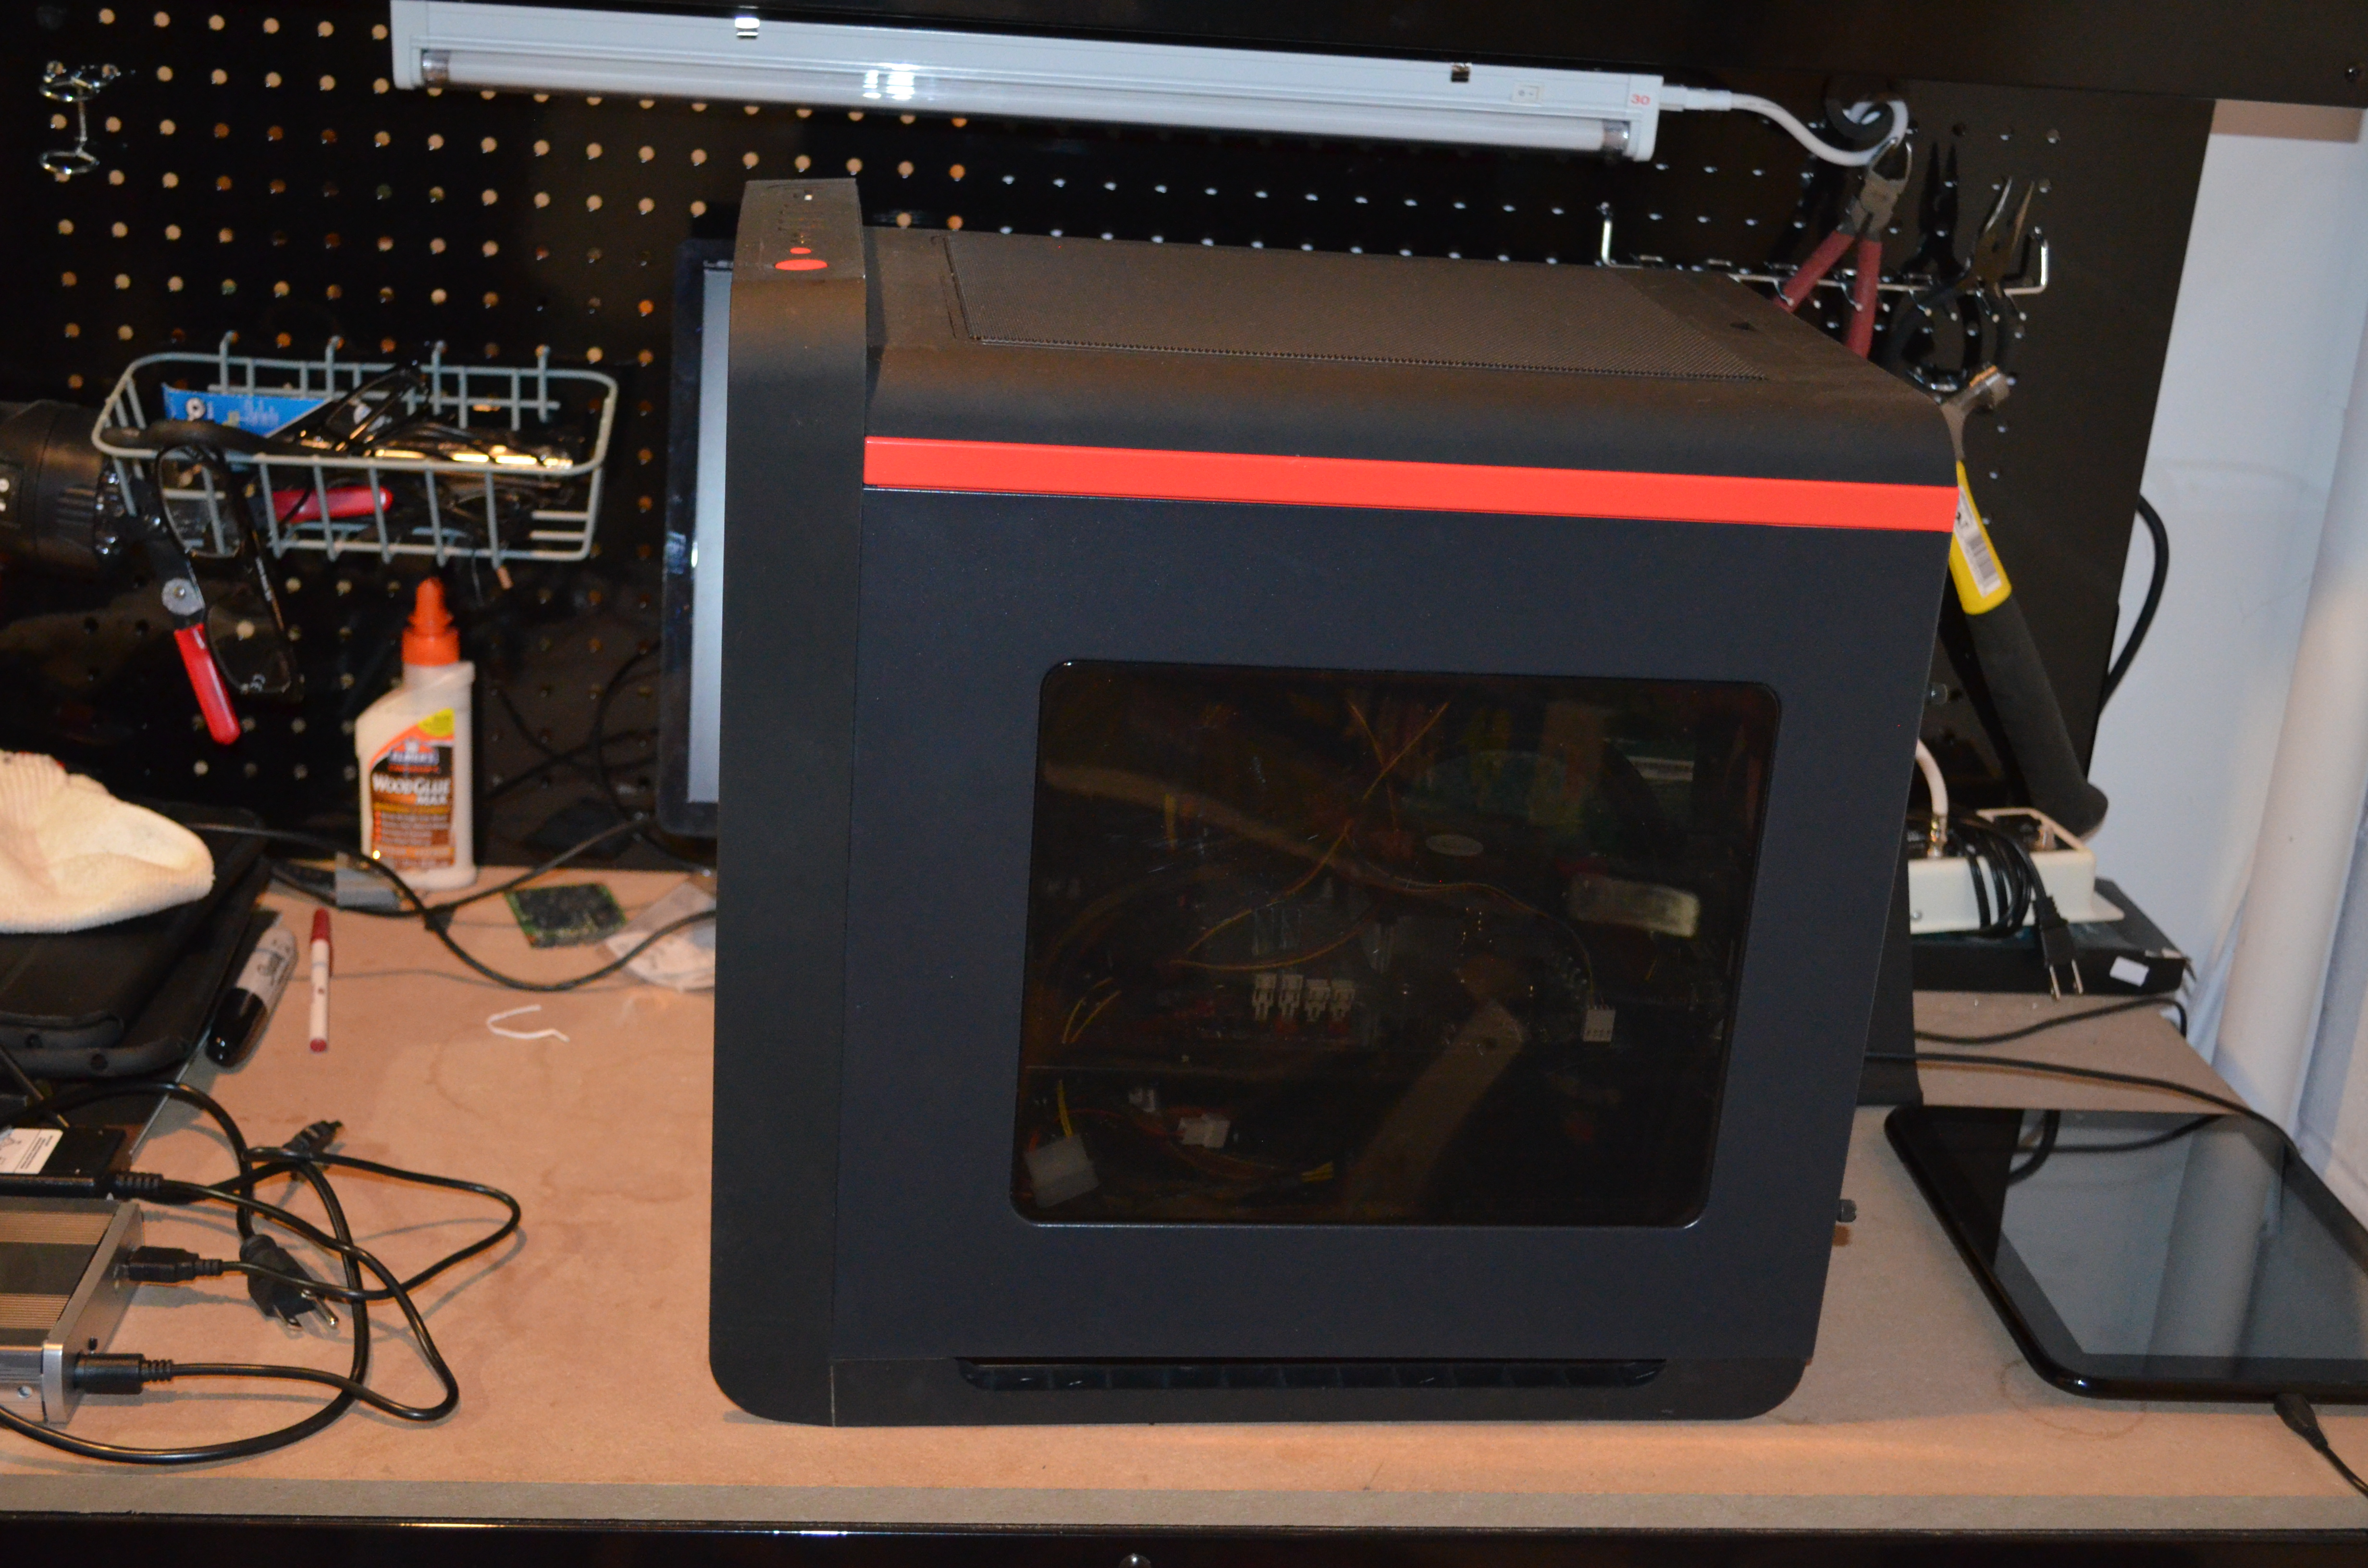 ans it serves our purpose. We added the two 120mm Cooler Master fans to the top panel which provides us with a great cross-flow environment. Also, the ease of adding SSD and HDD units provide us with the ability to add storage easily.
Second, we went with an AMD A8-7600 processor teamed with an ASRock A88M-G/3.1 motherboard. Our choice for processor was again based upon limiting the amount of components in the server unit. The A8 is a quad core Kaveri based processor which also incorporates Radeon R7 graphics. Running at 3.1ghz and only 65W, we assumed it would be an ideal fit for our server. The motherboard was selected due to its compatibi lity with the processor, the integrated R7 graphics, the four expansion slots, the S/PDIF optical audio output (for Digital DTS sound processing), along with the M.2 slot, which we’ll get to later. Now, on our prior machine we used an AMD FX-8300 processor teamed with an ASUS M5A78L-M motherboard along with a ZOTAC Geforce GT 730 graphics card which provided us with outstanding capabilities. However, on this build we decided to split hairs and reduce the amount of heat producing components.
We rounded out this build and we used two (2) 4GB Ballistix Sport DDR3 1866 memory sticks, an ASUS Blu-Ray drive, a 500gb M.2 module, two hard drives, one 500Gb SSD and another 2TB for our storage of movies, music, and recorded television along with an EVGA 450 Power supply.
Finally, for one of the most important pieces of our HTPC we went with the Hauppauge WinTV Quad HD tuner. This tuner has four (4) distinct ATSC and QAM tuners on one card with one input for the four. We have used USB tuners and single television tuners before but if you’re looking for a minimal component build this is the tuner to go with. And, you cannot beat the price ($99 direct from Hauppauge)!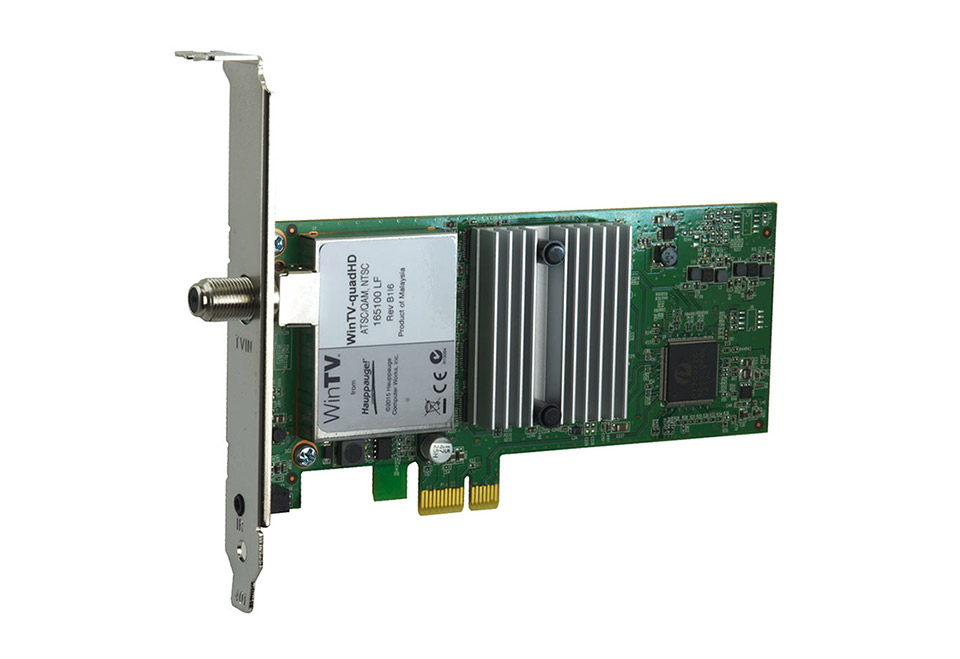
Setting up the unit
Okay, we’re not going to go over the construction of the server. Primarily because we think if you’re reading this article that you are an above average tech user already. If you would like, though, we would be happy to forward you tips and descriptions on how to if needed, or you can check out this rudimentary guide: http://www.pcmag.com/article2/0,2817,2485172,00.asp.
Now, onto the setup of our unit.
We’re going to break this up into each piece of software that will be necessary to have your HTPC server operate. All of these pieces of software will work together eventually in our shell. We will need an operating system, a video transcoder to burn your library of DVDs and Blurays, a PVR backend to transcode your live television feeds, a decoder for MP3 music discs, and finally, a version of Kodi, our main media player application which will tie everything in together.
- Operating System
Our most basic and yet most important piece of software. For this application we went with  Windows 7, primarily because of the use of the Hauppauge Quad HD tuner card. Hauppauge, for some reason, does not have drivers available for this particular card (as of this writing) in Linux, therefore it was necessary for us to go with Windows. As a bonus, Windows 7 still comes packaged with Windows Media Center, a now discontinued (or pay only) piece of software which basically does the same thing that we are going to set up using Kodi.
On a side note: We built our first unit using Linux Mint 17.2 and TVHeadend as our PVR backend and it worked great, however, setup of the PVR software is slightly easier using Windows. Not that things do not work well in Linux but it takes a slight bit of tweaking and is not for the faint of heart or those of you not familiar with using terminal commands.
- Video Transcoding software
As we noted before, one of the main appeals to building an HTPC server is to have direct access to your own library of movies and music, thus, the necessity of a video transcoder to perform the tedious task of burning your library to a drive. The two we recommend and use are Handbrake and MakeMkv. Both of these are open source and easy to use. Handbrake can be found at: https://handbrake.fr and MakeMkv at: http://www.makemkv.com/.
Handbrake is a very intuitive program to burn your DVDs and MakeMKV is designed to burn your Blu-Rays.
- PVR Backends
Now, here is where it can get slightly confusing. There is a plethora of PVR backends available for use in Kodi. The most popular ones are: MythTV, TVHeadend, and NextPVR. All three we’ve listed are open sourced and we have used and set up all of them.
A PVR backend is the controlling software for your television tuner(s). It is this piece of software that organizes and stores your television channels, your program guide, and your recordings.
PVR backends are fairly operating system exclusive. Therefore, for this application we went with NextPVR as it is an open sourced piece that is written for Windows.
Once again, if you have any questions concerning the other ones we have used feel free to contact us.
- KODI
Finally, our media player software: Kodi. Kodi is an open sourced media player application that was o riginally developed as the interface for the X-Box. Kodi can play your music, movies, pictures, games, stream weather, air your live television, and more. The versatility of Kodi is that it runs on Linux, OS X, Windows, iOS, and Android.
Additionally, Kodi has a built in UPnP program allowing streaming to your other UPnP devices which you will set up. This is the heart and soul of a full featured HTPC set up.
Kodi also has the ability to add programs that stream videos and music directly from network sources. Similar to the apps that you add to your tablets and phones, you will be able to stream programs directly from ABC, NBC, CBS, SYFY, Esquire, Bravo, etc…
NOTE: Kodi nor ourselves does not support or condone the use of illegal streaming sources.
Putting it all together
Now, assuming that you’ve built your Server, loaded all of the necessary drivers to the Bios, let’s go ahead and load our software.
- Load Windows, whichever version you would like. When loading Windows allow it to sit for a few days and load any updates it requires. Then turn off the automatic update feature. Trust me, you’ll be better for it. Otherwise, every time an update is loaded your Server will shut down and wait for a reboot. Not good if you’re running a whole house unit. Use necessary ‘maintenance’ times to install new software updates.
- Load the NextPVR software, available at: http://www.nextpvr.com. Allow it to find your tuner card but DO NOT set up your channels yet. We’ll do that after everything else is loaded and your Server is moved to its permanent place.
- Load your Handbrake software, available here: https://handbrake.fr
- Load MakeMKV, available here: http://www.makemkv.com.
- Load KODI, available here: https://kodi.tv/download.
- Windows media player should have the software necessary for you to rip music CDs to your machine.
And, that should do it, now some basic housekeeping setup on your server machine:
- Set up a folder titled ‘music’ on the drive you want to store your media. You should have at least two hard drives in your Server. We use one drive for the operating system and the live television functions and we use the other drive for our media. We will call them main drive and media drives.
- Set up a folder on your media drive for your burned movies. We were original and titled ours ‘Movies’.
- Set up a folder on your media drive for your burned Television Series. Again we named ours ‘TV Shows’. NOTE: When burning and labeling television shows it is important to notate them accurately so that the KODI scraper can identify them properly. The easiest way to do this is to set up a separate folder for each show, then a sub folder for the season. For example: Folder of Simpsons, within that folder Season 1, and all of season 1 episodes within that folder and labeled Simpsons S01 E01,Simpsons S01 E02, etc…
Getting ready to set up the HTPC Server
By now you should have built the machine and loaded the software. The next order of business will be to set the whole thing up. Move the machine to where you are going to keep it.
After positioning the machine to the area you want it (we set up our machine in our rec room within our entertainment center) it will be important to route the antenna signal for your live television feed.
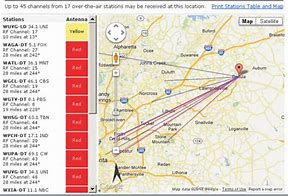
Available OTA stations in your geographical area courtesy of antennaweb
If, like us, you are going to receive your television signals from OTA, it is important to position the antenna properly. A great site for this is: http://www.antennaweb.org.
Antenna web will have you enter your zip code or address if you prefer, and then give you the list of channels you should be able to receive over the air. Aiming the antenna is important. If you live in a geographical oddity like we do, receiving a good signal is tricky. However, once you line it up properly the rest is easy.
We set up our antenna outside our home and routed the cable into the rec room where the server is located. We also added a signal amplifier due to the lack of quality signal we receive.
We receive 24 over the air channels where we are and if we were in a better location that number would approach close to 40. We have 24 channels that we are able to set up for recording and viewing. And, our library of recorded shows is usually too full to finish in a night.
*UPDATE* As of 12/2018 we gained 10 channels and now have 35 OTA channels available to us. All of which can be recorded.
Now, this, to us, is the heart and soul of an HTPC. Anyone can set up a media player but to incorporate live television and recording capabilities like a Tivo is what will elevate this unit to must have.
Some setup details
Loading Windows
Screenshot of loading windows operating system
This should be as clean an install as possible. Don’t add anything that doesn’t pertain to your Server. In other words, no office applications, etc… The only thing we have from Windows is what came with the operating system. Remember, you are using this machine only as an HTPC media hub.
Nothing else.
Loading NextPVR
When NextPVR installs it will be necessary to provide the following steps in order to synch your television tuner(s) to the NextPVR software.
- Right click anywhere on the NextPVR window and click Settings.
- Devices, click Device Setup for each device you want to use in NextPVR.
- Decoders, select the audio and video decoders you want NextPVR to use.
- Recordings, specify the directory to use for recordings.
- Folders, specify the directories where your media files are located.
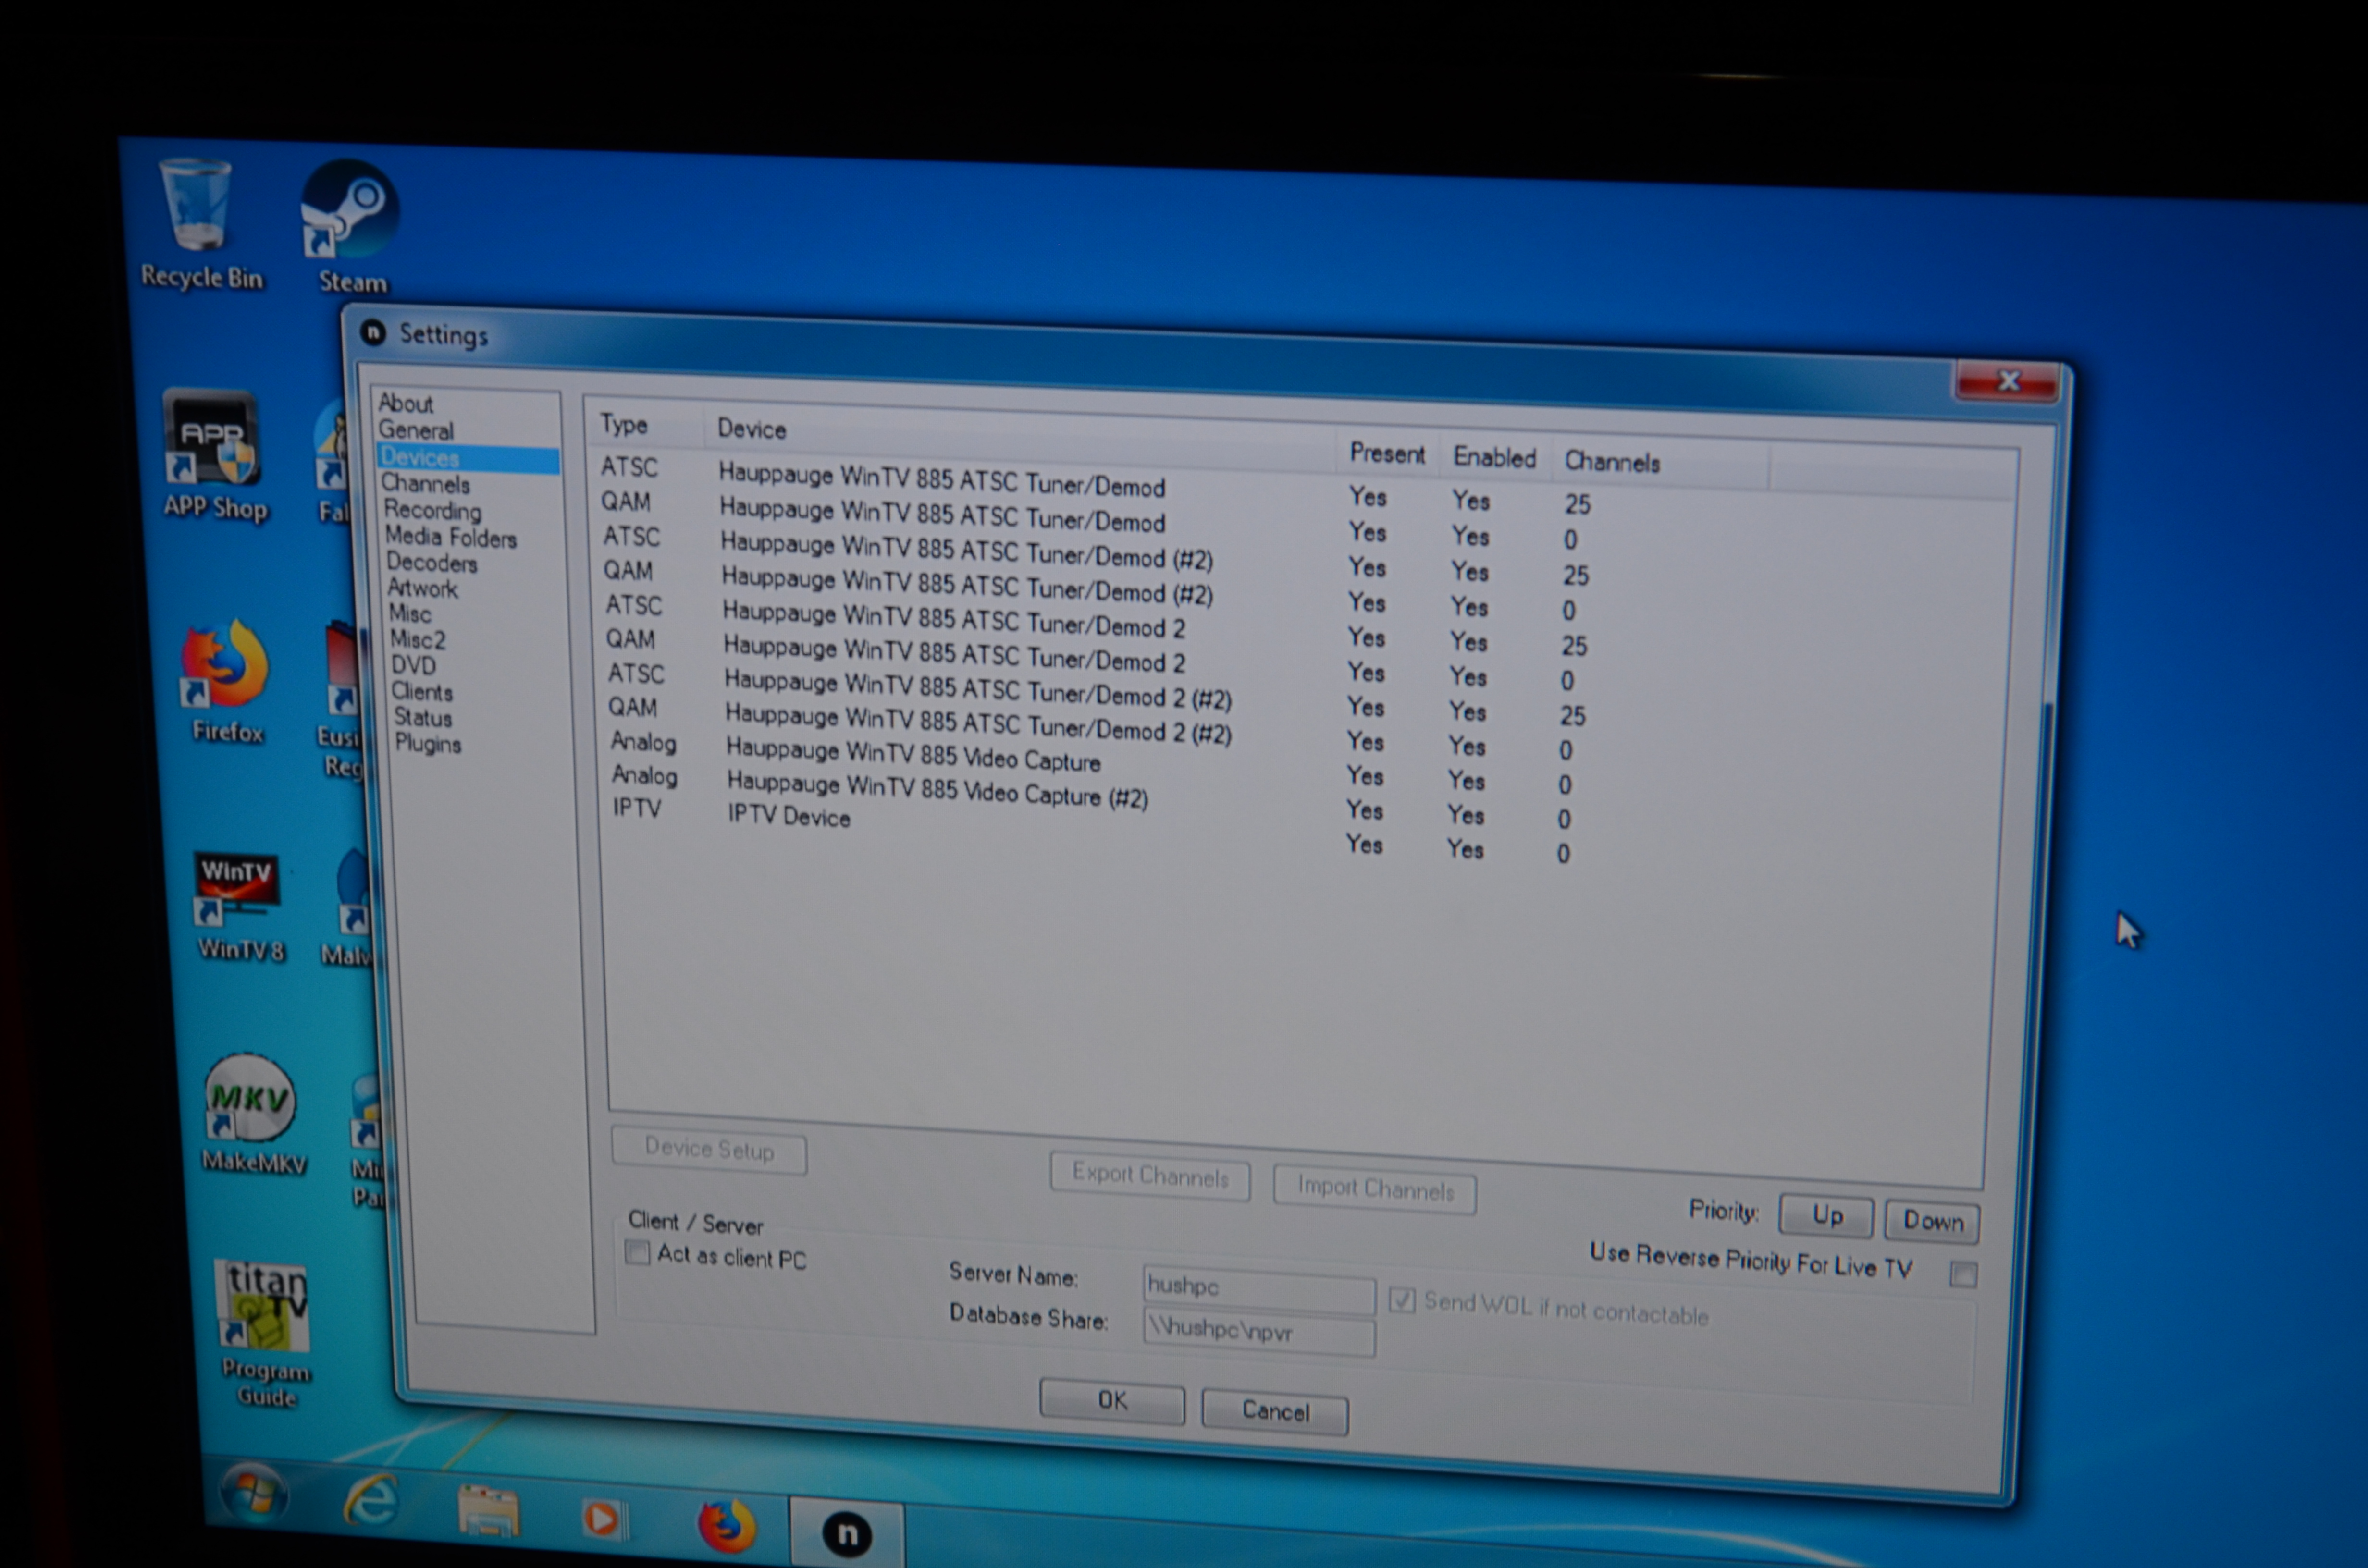
Screen shot of tuners set up and channels available on each tuner
Note: It will be necessary to set up each tuner on your machine separately in the NextPVR device set up. If you go ahead and use the Hauppauge WinTV Quad tuner you must set up all four tuners that are on the card. NextPVR makes it easy and shows you each one. A more detailed description is found at: http://www.nextpvr.com/nwiki/pmwiki.php?n=Configuration.Devices#toc1.
Before moving on from this step make sure that your tuners are receiving television signals by using the NextPVR program to watch channels.
After the setup of your OTA channels is complete we can move onto tying this all together.
Loading your media files

A shot of our ‘media’ drive featuring movies, radio shows, music, etc…
All right, now we realize you’re getting anxious but now it’s time for more setup. As we mentioned prior, having a library of ready to play and stream media is what makes an HTPC unit unique. This should merely be time consuming if you already performed the prior steps we laid out.
Thus, when burning music files place them in the ‘Music’ folder, Movies in the ‘Movies’ folder, and Television Shows in the ‘TV Shows’ or whatever you decided to name them.
Set up your television tuners and EPG.
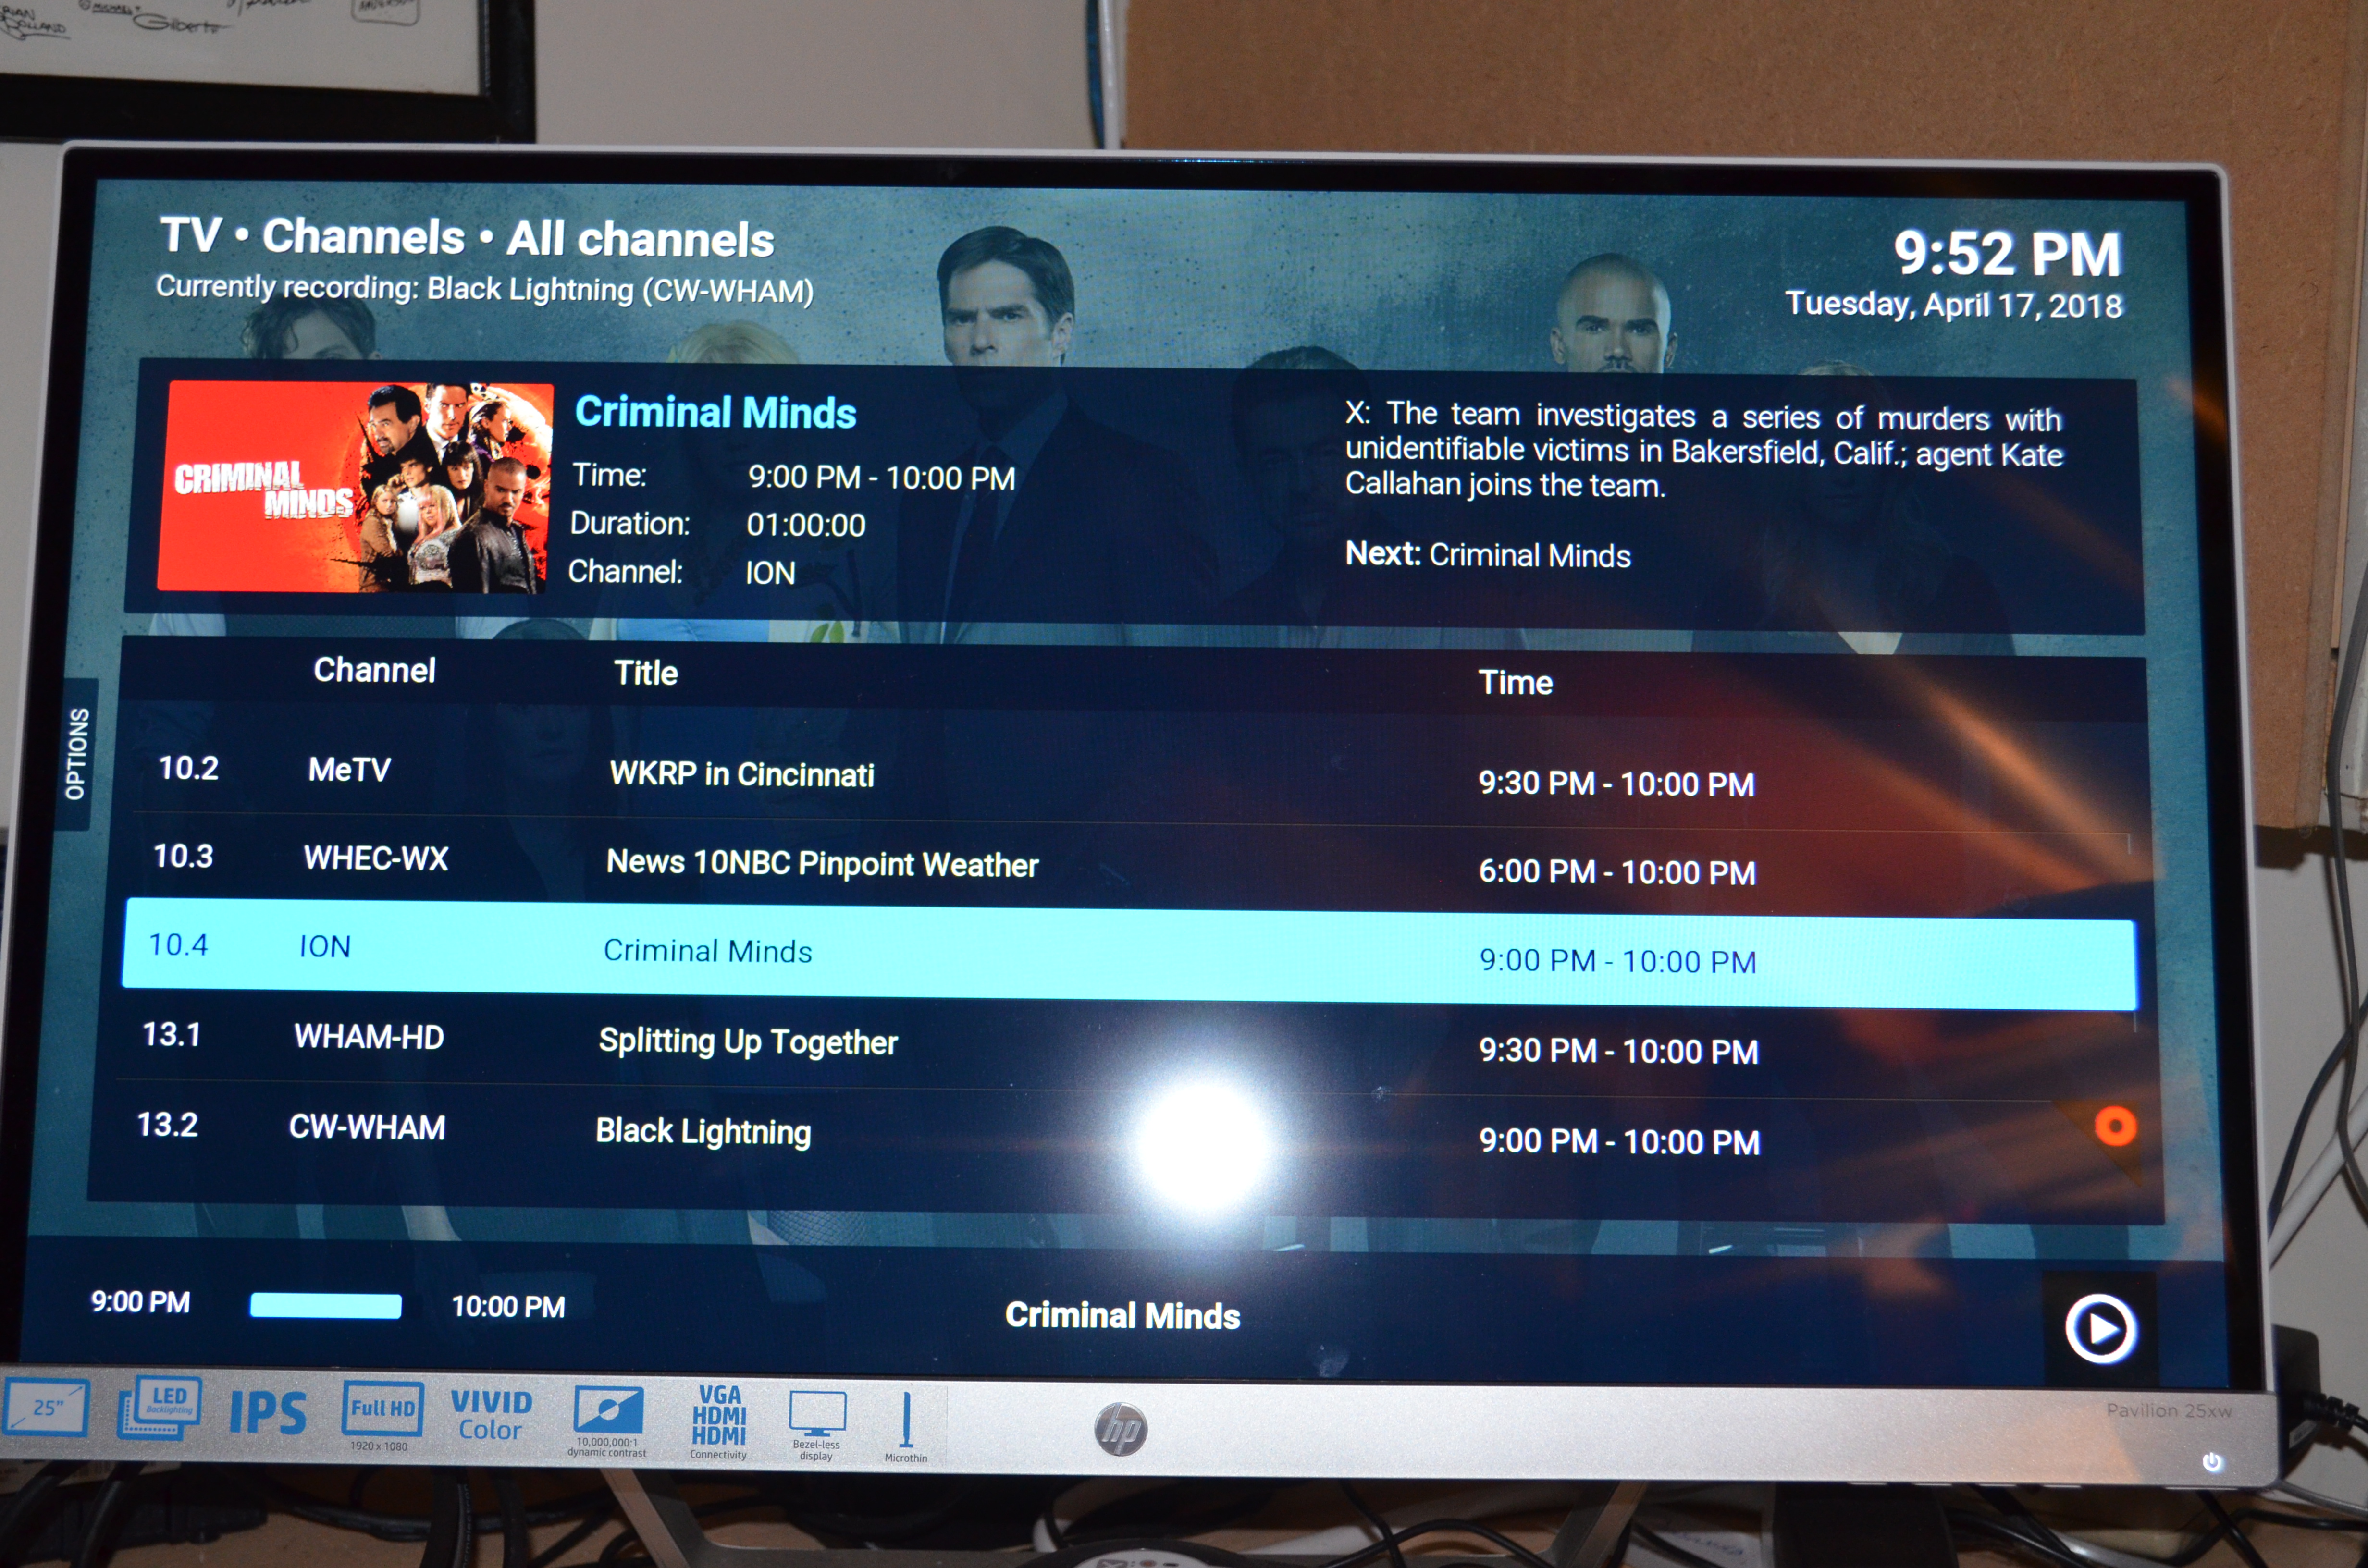
Screenshot of EPG. Note red circle indicates show being recorded.
Before we start, what is an EPG? An EPG is the acronym for Electronic Program Guide, it is essentially an electronic TV guide that displays on your screen. The best one to use if you live in the United States is Schedules Direct which 9412494124
will cost you $25 for a year’s subscription. A well worth-it investment for a product that works great! Located at http://www.schedulesdirect.org, the setup is self-explanatory.
Okay, you have your EPG guide account, your tuner in your server, and your antenna hooked up and positioned properly, so open your NextPVR program and right click on the open window. You’ll see a menu of Open File, Live TV, etc… click on ‘Settings’ and it will bring up another menu. Click on the ‘Devices’ tab and follow the on screen directions. It should show all four of your tuners. A walk –through on configuring your tuners is listed in detail here: http://www.nextpvr.com/nwiki/pmwiki.php?n=Configuration.Devices.
It is here also that you will attach your EPG to the channels after a channel scan.
After you finish the above steps you are ready to tie this all together.
Setting up your Kodi Media Player Software Server
Okay, so if you setup everything on your server prior, you should be able to setup Kodi in no time at all. Let’s lay it out in no particular order the steps to tie in all of your prior hard work and begin to enjoy your home theater media center experience. Keep in mind that you will be doing this for every remote television in your system. For more detailed explanations of what you’re Kodi software can do visit http://kodi.wiki.
Install your video add-ons.
These are found by going to the Add-ons manager. Just go to this link: http://kodi.wiki/view/Add-on_manager. It will explain in better words than I (why reinvent the wheel?). Some recommended add-ons are:
*Exodus – provides movies, television shows, etc… in an easy to use format. http://koditips.com/exodus-kodi-addon-lambda-install-guide/
*WNBC – Most NBC shows available for streaming. Found on your Kodi add-ons repository
*WCBS – Most CBS shows available for streaming. Found on your Kodi add-ons repository
*WABC – Most ABC shows available for streaming. Found on your Kodi add-ons repository
*Comet TV live – Live streaming of Comet, a channel that shows predominantly B-movie and Science Fiction programming.
*Food Network – Food Network programming available for streaming
*SYFY network programs available for streaming
And so on, one of the strengths of the Kodi unit is the plethora of add-ons that you can incorporate into your system that offer different streaming shows.
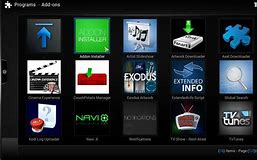
Nice shot of typical Kodi addons
Set up your movie library
This, as stated before, is one of the neatest features of the Kodi HTPC. So, we’re going to add a media source which will use all of your hard work from prior. Once again we’ll give you a link: http://kodi.wiki/view/Media_sources which will walk you through it. You will use the folder you set up as ‘Movies’ as your source.
Or, if you like our voice we’ll walk you through it.
First, go to the Settings tab on your Kodi skin. We use the Titan skin.
Set up your music library
Similar to above. You’re going to use the folder you set up your music in, ‘Music’ as your source. http://kodi.wiki/view/Adding_music_to_the_library.
Set up your television shows library
Once again, similar to the above set ups of libraries. Using your Television Shows folder and the scraper will do the rest for you if notated properly.
Setup your live television
 This is what is going to separate your HTPC from the pack of Firesticks, Apple TVs and the such. If everything was set up prior, we know that we receive over the air television channels. Thus all that is left is to tie it in to our media shell.
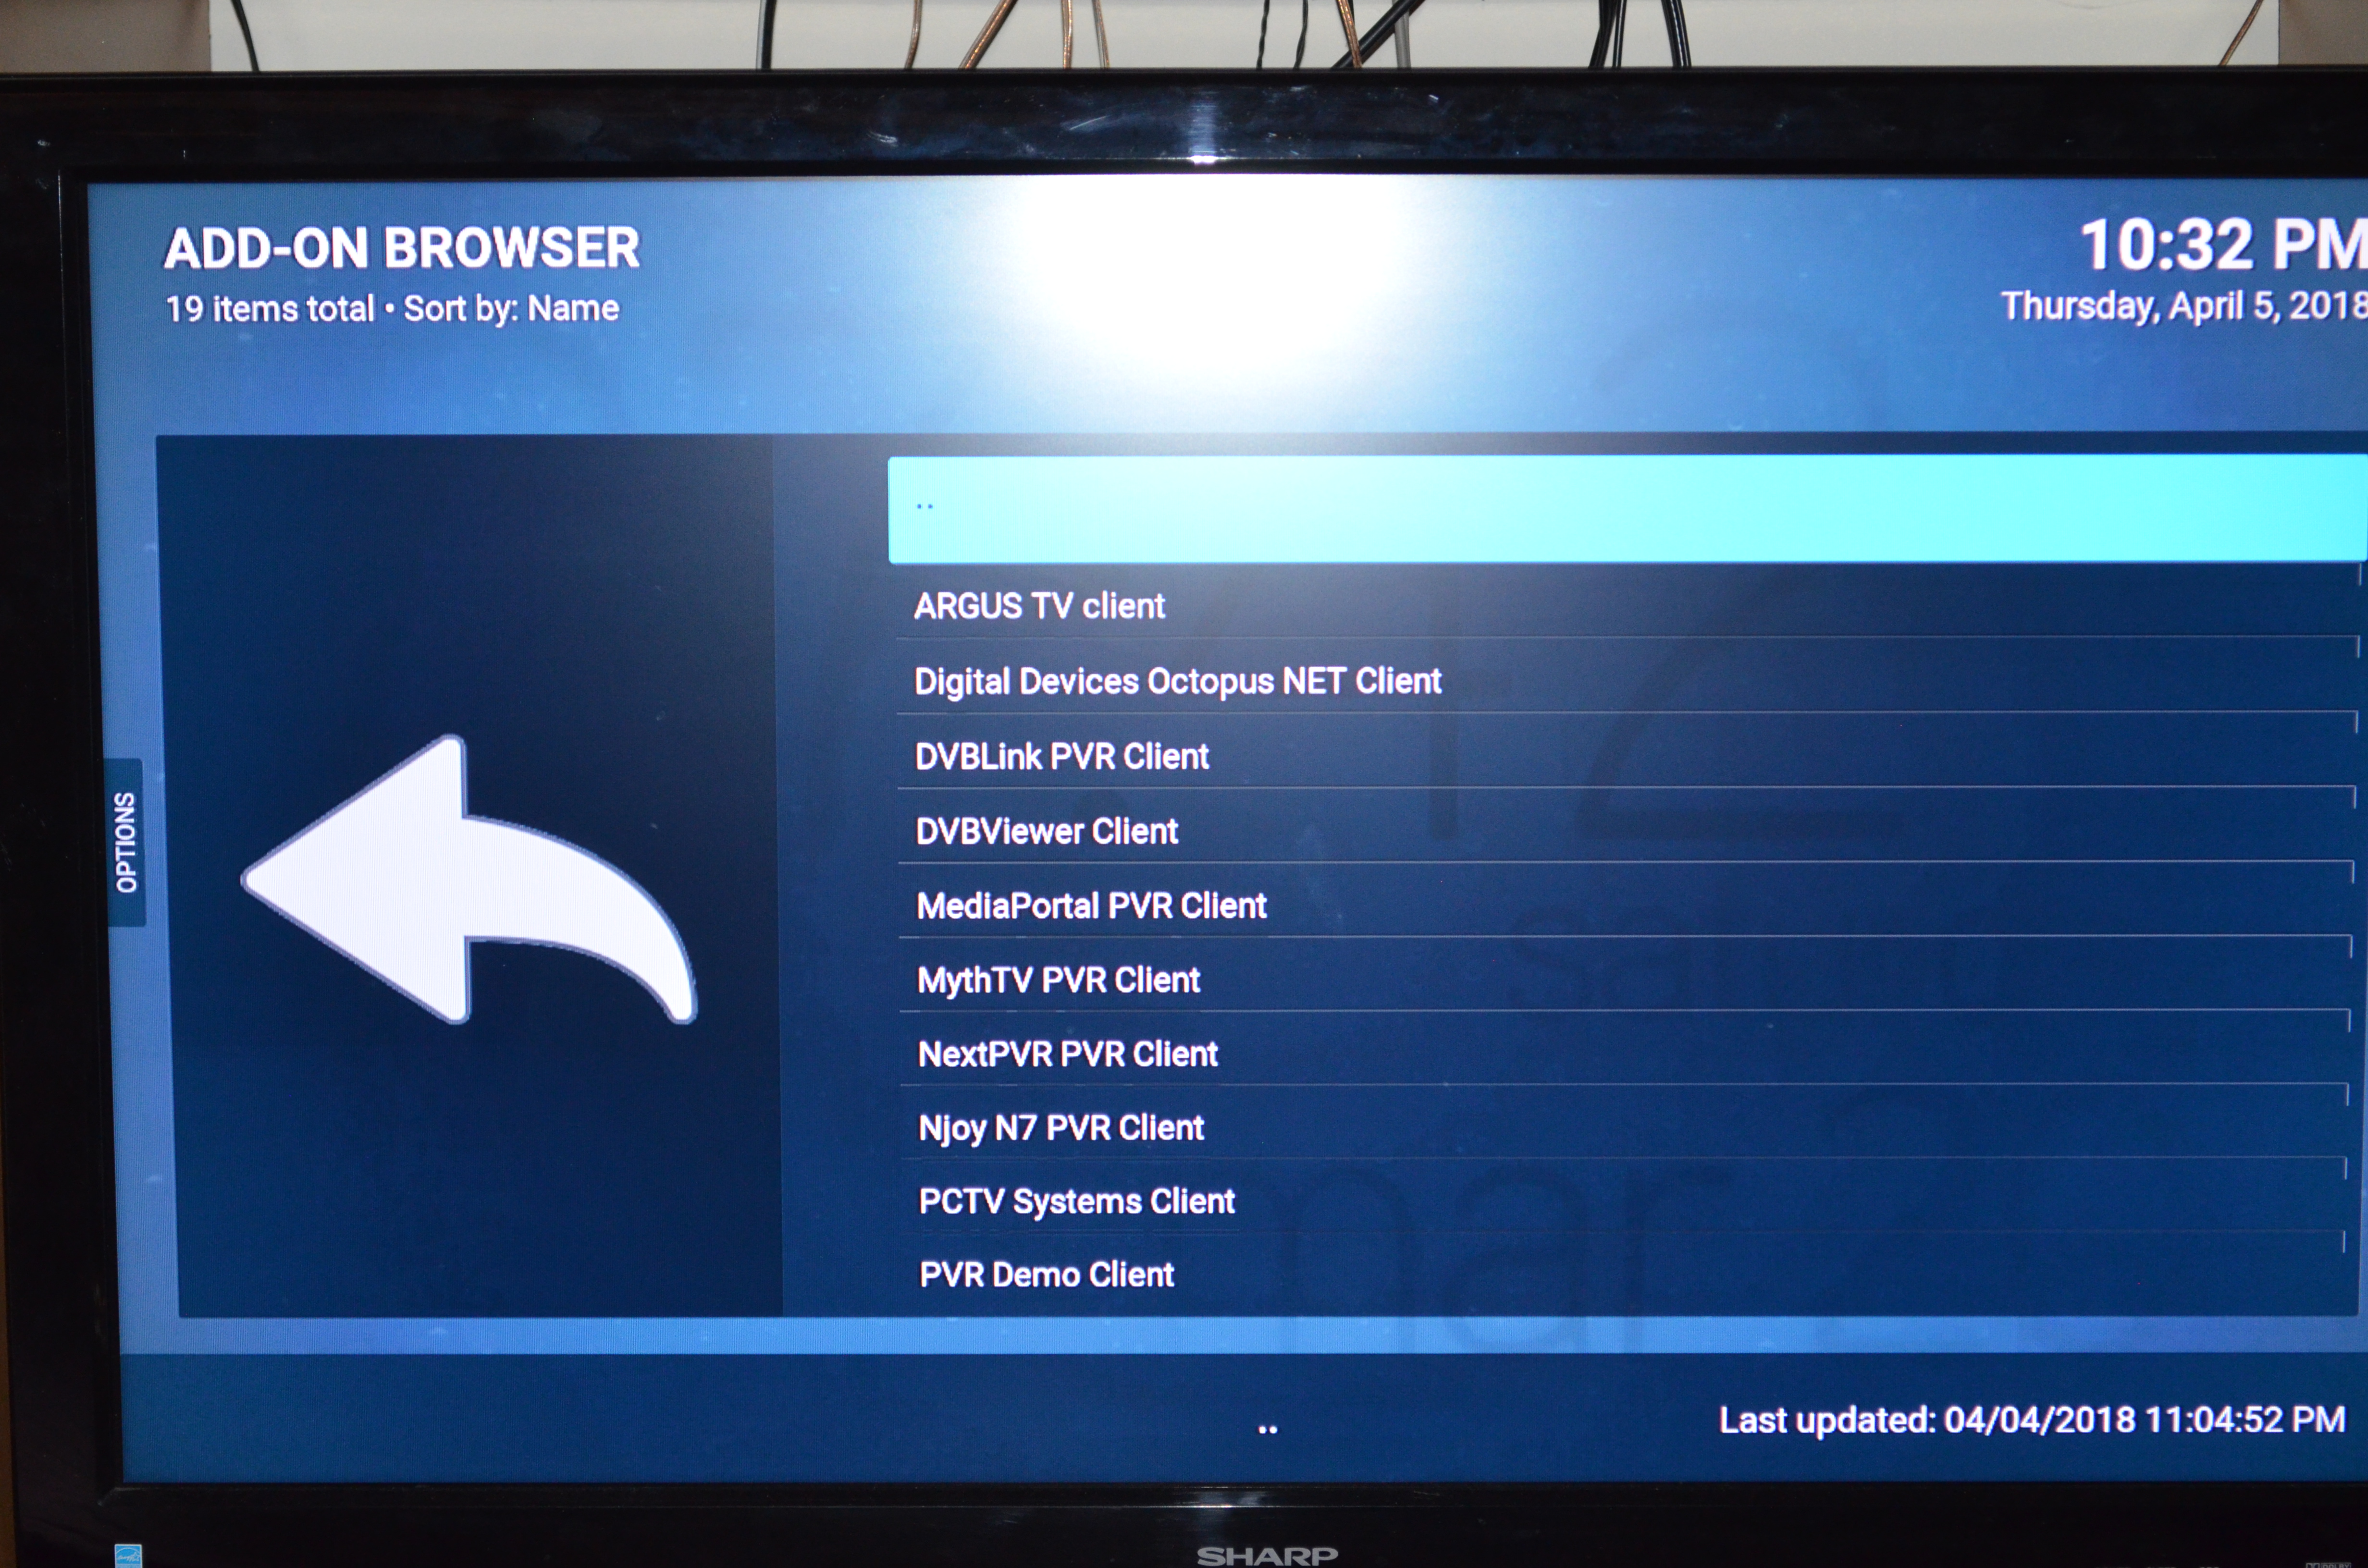
- First, go to your add-on manager
- Select the option to ‘Install from repository’
- Select ‘PVR Clients’ or similar
- Select the PVR backend that you are using. In our example we select the NEXT PVR choice.
- Exit out of this screen and go back to the main setup menu
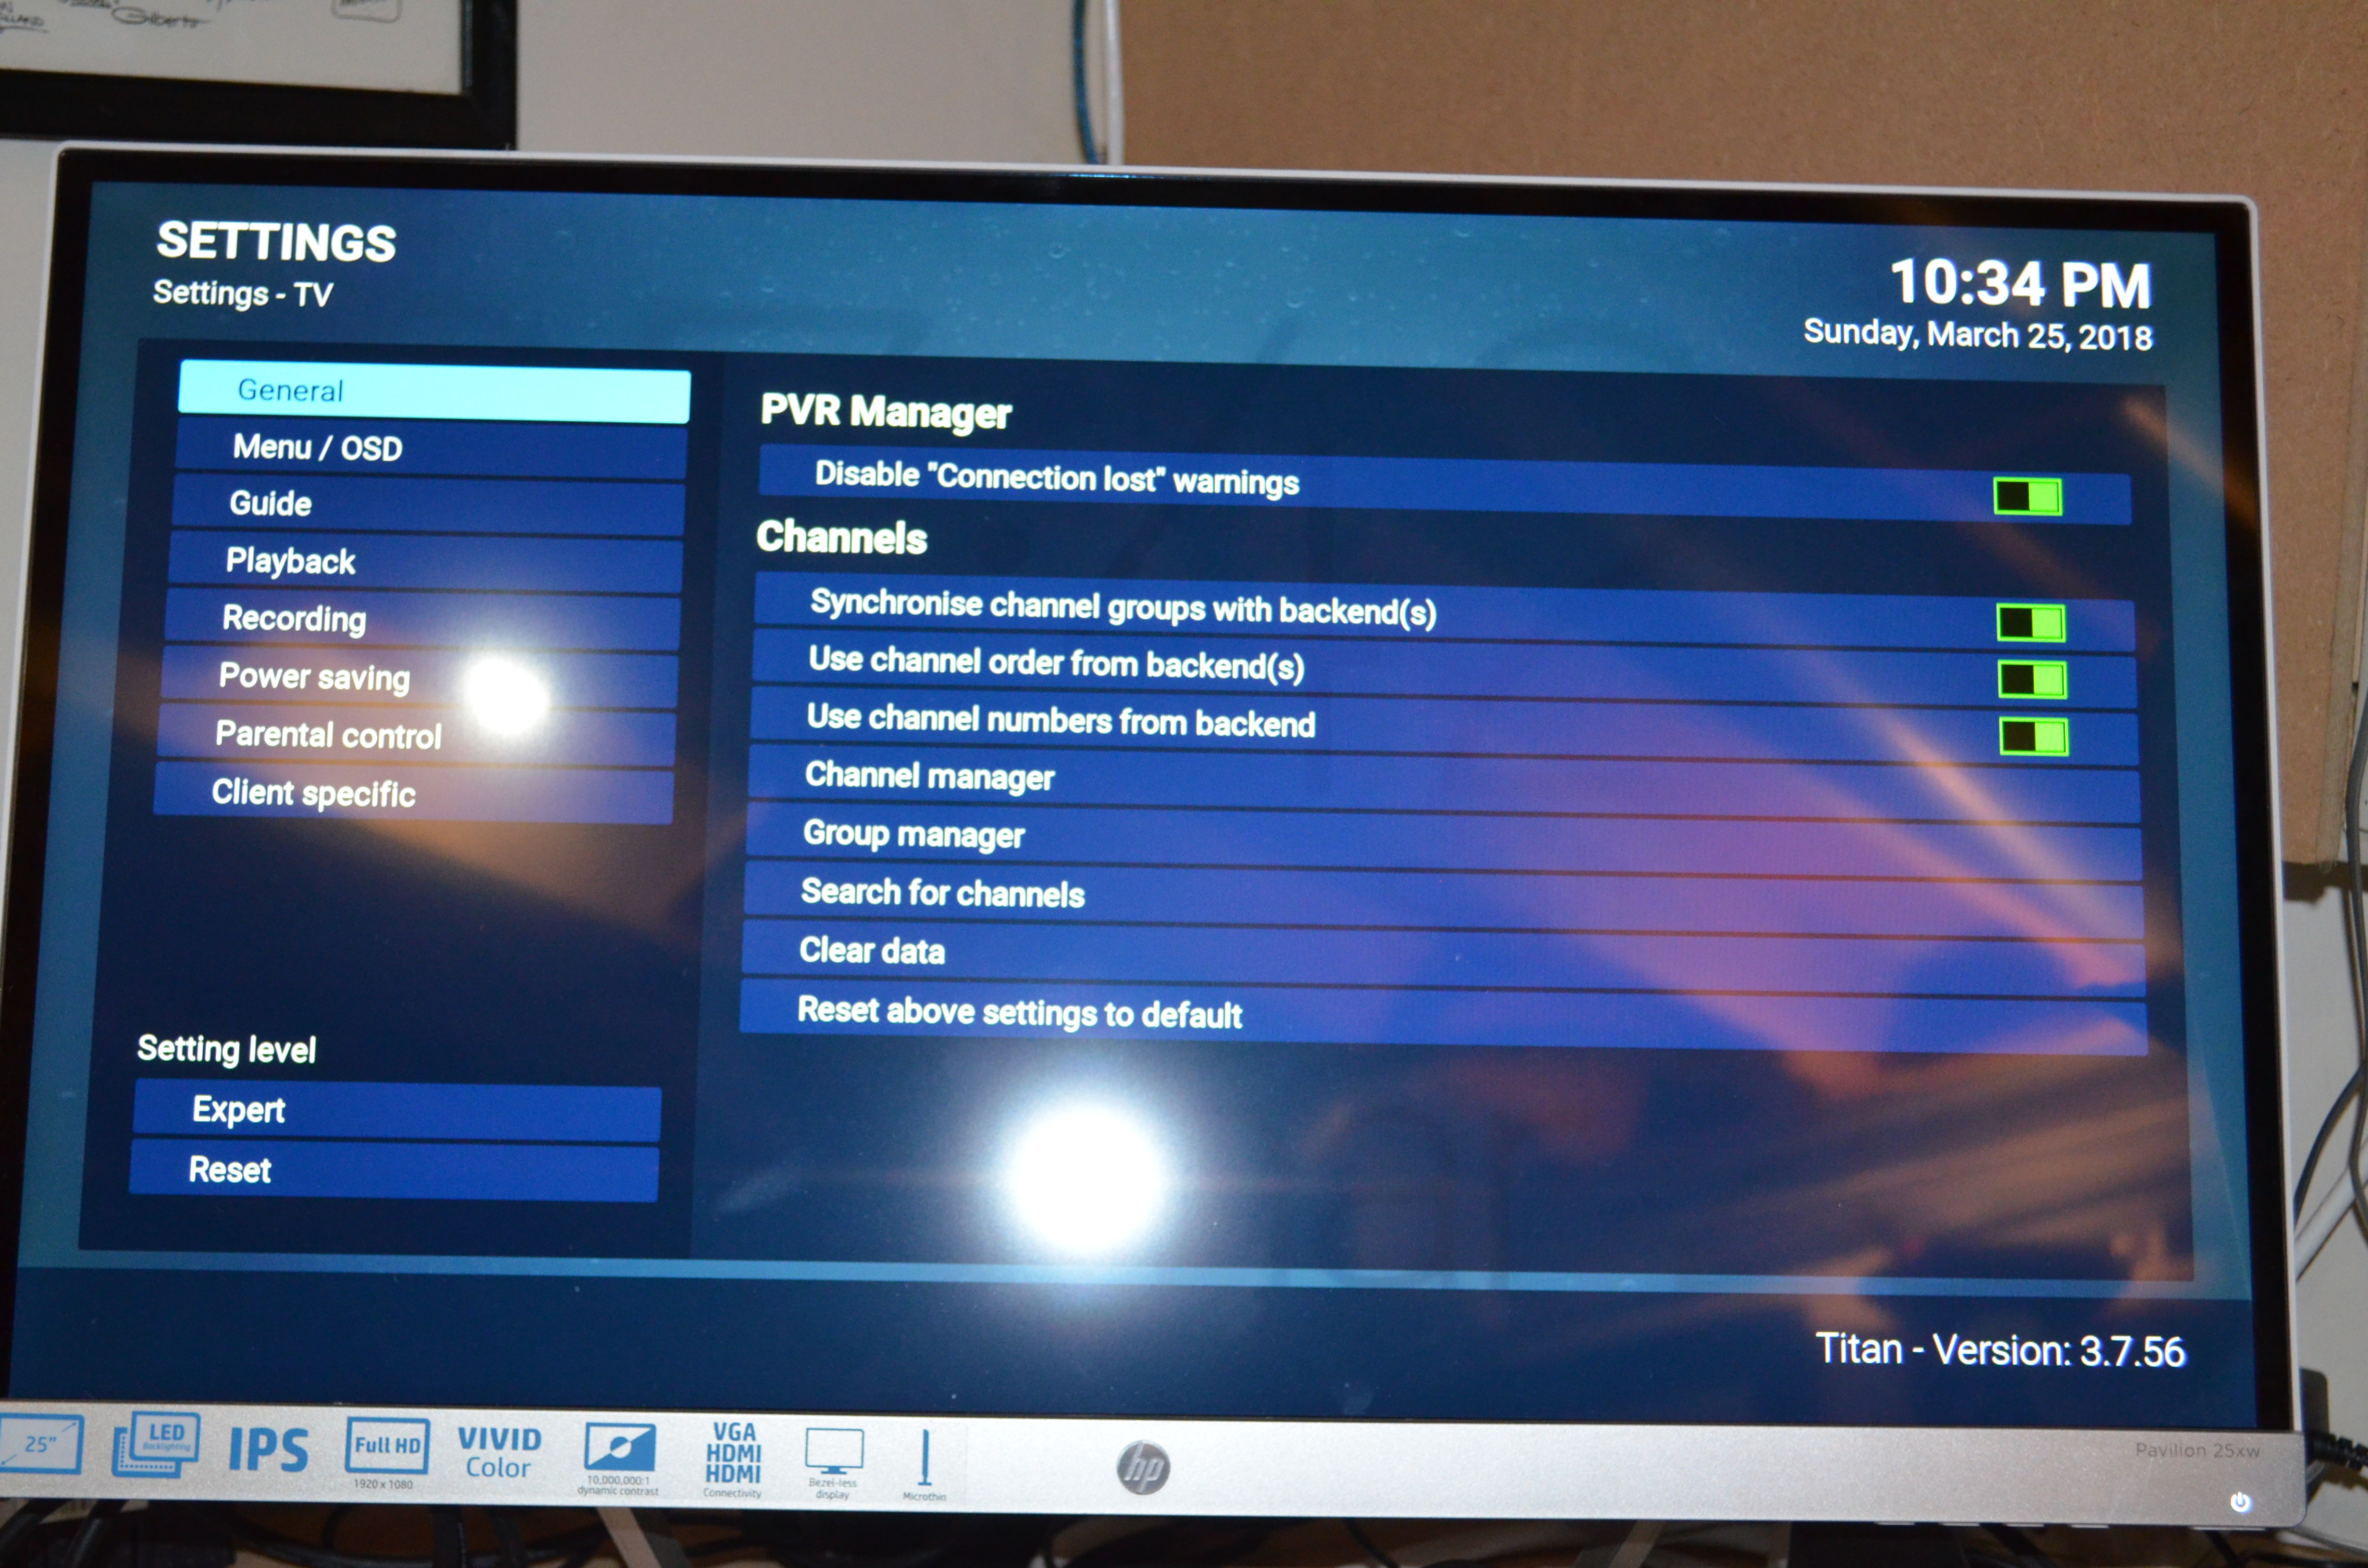
- Go to the Live TV tab and select “Enable Live TV”

- If you’re like me and want the channel numbers to match your local guides select the “synchronize channel groups with backend”
And, that’s that. For a more detailed explanation you can go to: http://kodi.wiki/view/PVR/Basics/
Finishing it up
Okay, now you’re all set to enjoy your HTPC experience. You normally shouldn’t but I’m a creature of old habits so it’s here that I reboot the ‘server’ and start fresh. From here you should:
- Start Windows
- Open up Kodi on your Windows menu
- If everything was done correctly you should see a blurb on top of your screen telling you that channels, EPG, and recordings are being imported from your PVR backend.
A word on Remotes
One of the most important items that we don’t think of is the control unit for our HTPC system. If you’re anything like us you would prefer as few remotes as possible. A neat device for controlling you Kodi is the Flirc: https://www.flirc.tv/ You can keep your present remote that you use for your television and use it to control your HTPC units after programming.
We currently use a Flirc on our main television and mini wireless keypads for the other units.
Adding remote satellite units
Now that you’ve done all the hard work, streaming the material from the server is easy. You can use any of the Kodi exclusive shells loaded onto your 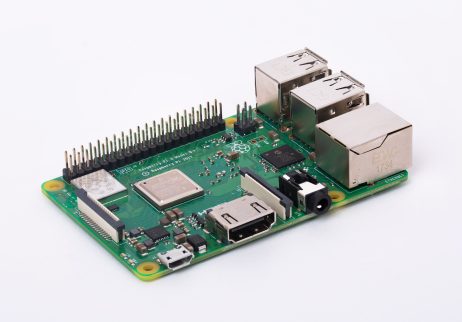 remote unit. The most popular remote unit is the Raspberry Pi. A small, 1.2GHZ quad core processor ARM based unit with 1GB of ram. I find that the Pi works very well for a remote unit but lacks in the wifi department. If you are going to use a Pi I would make sure you have an Ethernet connection if you are planning on streaming live television. Otherwise it works well as just a streaming box for either your library of movies and music or add-ons.
 Another alternative is the mini-pc units. One we like is the Gigabyte Brix equipped with the AMD A8 processor. We added 4GB or Ram and an SSD with 16gb of space. This unit also has an AMD Radeon HD 8550G graphics. We like these units because you can usually find them on sale as refurbished and they can be completed rather inexpensively using used parts. As a remote unit the HD only needs to have enough space to store the operating system. Which is usually under 8GB. Our Gigabyte Brix unit cost us $145 refurbished, $24 for the memory, and $20 for a used SSD. The Brix is probably overkill but for the peace of mind it gives us it’s worth it.
For our installation we used a raspberry pi3 unit via wifi for our one television and a Gigabyte Brix unit equipped as described above for our main television.
After deciding upon the remote unit hardware you would like to use, select the operating system you would like to run. For remote units, again because they are just streaming content from the server, you can use a stand-alone Kodi distribution. The two most popular are OSMC and OpenELEC. Both of these are open source applications which will permit you to boot directly into your Kodi application. We have used both of these and they both work great.
OpenELEC can be found at: http://openelec.tv/
OSMC can be found at: https://osmc.tv/
Setting up your remote units
Live TV
Open up your Kodi application. First thing you want to do is to activate your Live Television capabilities. Go to Settings, Live TV, and like you did on your server check the box that has ‘Enable Live TV’ or other such button. It will prompt you to add a PVR add-on. Select the PVR add-on for what you’re running (Probably NextPVR), go to the add-on and configure it. Configuring the add-on will require you to enter the IP address of your server.
Set up Movies, TV Shows, and Music from Server unit
Go to Settings, and then Services. Scroll down to the UPnP button and select ‘Share My Libraries’ or other such button. You will then go to your video button and music button on the main screen and follow the instructions to set up the sharing from your server. If you need more help go to: http://kodi.wiki/view/HOW-TO:Share_libraries_using_UPnP for a step-by step guide.
Setup Add-ons
You will set up add-ons on your remote units like you did for your server. Here, you can take advantage of the different units to set them up custom for each room. If one unit is in your bedroom and you like watching DIY network you can set that up while loading only children friendly add-ons for the Kids’ rec room TV.
You’re DONE!
And, that’s it! You’ve done what very few people can do, you’ve set up your entire home as a technological marvel! At your fingertips you have a plethora of entertainment!
One Final Note
Now, while it was fun and it was relatively cost free remember this: A lot of people went ahead and developed this software for you and most of it was free of charge despite the time, effort, and brain power that it took to develop it. So, don’t forget to contribute to these people.
I send a stipend of between $15 and $20 to the following when I use their software and sometimes a couple of times per year. Whatever you give is up to you but even $1.00 is better than nothing and a good gesture on your part considering how much you are going to get out of it.
Kodi: https://kodi.tv/contribute/donate
NEXTPvr: http://www.nextpvr.com/donate.html
OSMC: https://osmc.tv/about/#donate
OpenELEC: http://openelec.tv/donate
TVHeadend: https://tvheadend.org/